
Main Courses
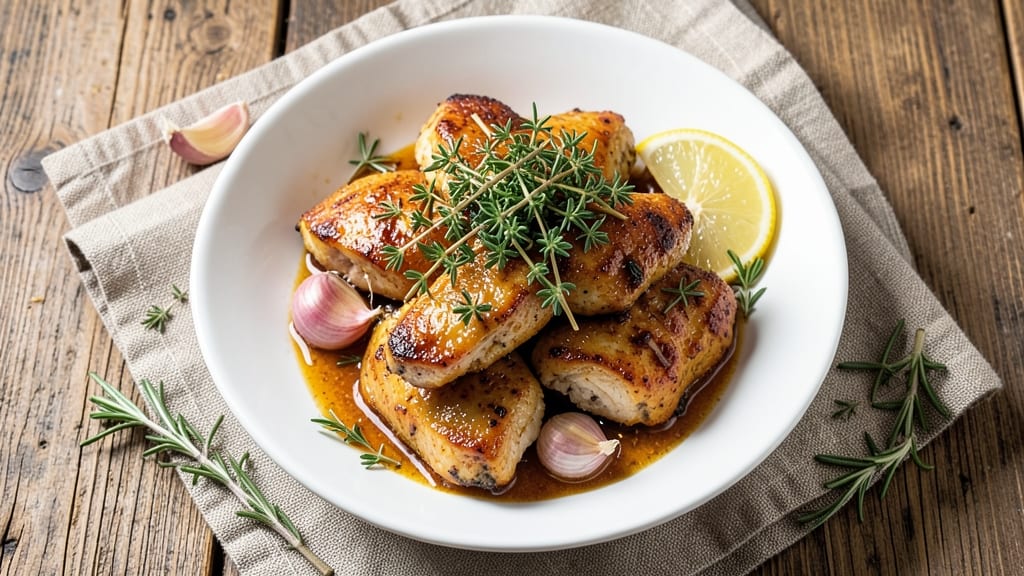
This baked marinated chicken tenders recipe delivers restaurant-quality results with a crispy exterior and juicy interior—all in just 20 minutes. The secret lies in a simple yet flavorful marinade that tenderizes the chicken while infusing it with herbs and citrus, ensuring every bite is packed with depth.
No deep-frying required, making this a healthier, foolproof alternative to traditional crispy tenders.
The marinade combines olive oil, lemon juice, garlic, and fresh herbs like thyme and rosemary, creating a bright, aromatic base that transforms plain chicken into something extraordinary. The key technique? Baking at 425°F for 15-20 minutes ensures the tenders stay moist inside while achieving that golden, crispy crust outside.
Perfect for weeknight dinners, game day appetizers, or a quick protein boost for lunchboxes.
What sets these tenders apart is their versatility—serve them with honey mustard dipping sauce, a side of roasted vegetables, or even on a salad for a light yet satisfying meal.
The marinade can also be doubled and stored for up to 3 days, making this recipe both time-saving and prep-friendly. Whether you're feeding a family or meal prepping for the week, these herb-infused bites are a game-changer.
No special equipment is needed—just a baking sheet and parchment paper. The instructions are straightforward, ensuring foolproof results even for beginners. By the time you're done, you'll have tender, flavorful chicken that rivals takeout but with the comfort of homemade. Ready to elevate your next meal? Let’s get started.
Ingredients for baked marinated chicken tenders
Herb-infused marinade plus a crispy breadcrumb crust—just 13 ingredients for restaurant-quality tenders.
| Ingredient | Amount | Notes |
|---|---|---|
| Boneless, Skinless Chicken Breast 🍗 | 1 ½ lb | Cut into 1-inch thick strips |
| Extra-Virgin Olive Oil 🫒 | ¼ cup | For marinade and coating |
| Fresh Lemon Juice 🍋 | ¼ cup | Freshly squeezed, bright flavor |
| Garlic Cloves 🧄 | 4 cloves | Minced for marinade |
| Fresh Thyme Leaves 🌿 | ¼ cup | Chopped, stems removed |
| Fresh Rosemary Sprigs 🌿 | ⅛ cup | Chopped, finely minced |
| Diamond Crystal Kosher Salt 🧂 | 1 tsp | For seasoning, plus extra |
| Ground Black Pepper 🌶️ | ½ tsp | Freshly cracked peppercorns |
| All-Purpose Flour 🌾 | ½ cup | For breading, light coating |
| Panko Breadcrumbs 🍞 | ½ cup | For extra crunch |
| Cornstarch 🌾 | 1 tbsp | For crispier coating |
| Granulated Garlic Powder 🧄 | ½ tsp | Enhances flavor |
| Dried Oregano 🍃 | ½ tsp | For extra herb depth |
The chicken is where it all starts. Thighs or breasts? Breasts here for leaner bites, but thighs stay juicier if you prefer. Grab boneless, skinless breasts from the meat counter—Trader Joe's or Whole Foods have the freshest cuts. Cutting tip: slice against the grain for maximum tenderness. The herbs? Fresh thyme and rosemary make all the difference—dried works in a pinch (use half the amount), but fresh is worth the extra minute to chop. For the olive oil, California Avocado Ranch or Bertolli are my go-tos—they’ve got that fruity punch that translates perfectly to the marinade.
No fresh herbs? Dried thyme and oregano will get you close, but taste the difference first. Short on panko? Regular breadcrumbs toasted in a dry pan work too—just pulse them in a food processor first for finer texture. The cornstarch is non-negotiable for that crispy crust (trust me, it’s worth the extra tablespoon). For the lemon juice, Meyer lemons if you can find them—they’re sweeter and brighter. No Meyer? Regular lemons, freshly squeezed. The marinade can sit for up to 4 hours, but 30 minutes is perfect for maximum flavor without over-marinating.
Prep ahead like a pro: marinate the chicken overnight if you’re really organized, but even 30 minutes makes a difference. The breading station? Set up a shallow dish for flour, one for egg wash (if using), and one for the panko mix. Keep everything cold until baking—cold chicken sears better. Leftovers? These reheat beautifully—5 minutes at 375°F with a splash of water in the pan. Store in an airtight container for 3 days in the fridge or freeze for 2 months. Pro tip: portion into single servings before freezing for easy grab-and-bake lunches.
Why You'll Love This Recipe
- No-Fuss Prep: I swear, the hardest part is slicing the chicken—no breading, no frying, just tender strips marinated in lemon and garlic while I sip my coffee. The olive oil and thyme do all the heavy lifting for flavor.
- Herb-Packed Punch: That bright lemon juice and minced garlic? It’s like a flavor bomb—juicy, aromatic, and just crispy enough on the edges. Honestly, my kids ask for seconds before I even finish plating.
- Weeknight & Meal Prep: Toss these in the fridge for up to 3 days, and they’re ready to bake in 20 minutes. Perfect for busy nights or packing lunches—no sad, dry chicken here.
- Budget-Friendly Crisp: Chicken breast is cheap, but this method makes it feel special. The olive oil keeps it moist, and the thyme adds depth without breaking the bank. Leftovers? Even better reheated than takeout.
Step-by-step instructions for herb-infused baked chicken tenders
Here's how to transform simple chicken into restaurant-worthy herb bites with crisp edges and juicy centers.
Create the Herb-Lemon Marinade
In a medium bowl, whisk together the 0.25 cup extra-virgin olive oil, 0.25 cup fresh lemon juice, 1 tsp diamond crystal kosher salt, and 0.5 tsp ground black pepper. The lemon juice should immediately brighten the oil, turning it from pale gold to a vibrant amber.
Add the 4 minced garlic cloves, 0.25 cup chopped fresh thyme leaves, and 0.125 cup finely minced fresh rosemary sprigs to the mixture. Stir well until all the herbs are fully incorporated and the marinade looks like a fragrant, chunky paste. This herb blend is what gives these tenders their signature depth of flavor - don't skip the fresh herbs if you can get them.
Marinate and Prepare the Chicken
Cut the 1.5 lb boneless, skinless chicken breast into 1-inch thick strips (about 12-15 pieces). Place them in a resealable plastic bag and pour the herb marinade over the chicken. Seal the bag and massage it gently to coat all surfaces of the chicken evenly.
Refrigerate the bagged chicken for at least 15 minutes, but up to 2 hours if you have time. The marinade should penetrate the chicken, giving it that bright, herby flavor throughout. If you're short on time, even 10 minutes will work - just make sure the chicken comes to room temperature before cooking for more even results.
Set Up the Breading Station
In a shallow dish, combine the 0.5 cup all-purpose flour, 1 tbsp cornstarch, 0.5 tsp granulated garlic powder, and 0.5 tsp dried oregano. The cornstarch is key here - it helps create that extra-crispy coating we're after. In another dish, place the 0.5 cup panko breadcrumbs ready for the final step.
Remove the chicken from the marinade (let any excess drip off) and pat it dry with paper towels. This step is crucial - dry chicken creates a better seal with the breading, leading to maximum crispiness. The chicken should feel cool and slightly tacky to the touch after patting.
Bread and Bake to Golden Perfection
Working in batches to avoid crowding, dredge each chicken strip first in the flour mixture, pressing gently to adhere. Shake off any excess, then dip into the panko breadcrumbs, pressing again to ensure complete coverage. Place the breaded tenders on a parchment-lined baking sheet, leaving about 1 inch between each piece for even air circulation.
Preheat your oven to 425°F while you bread the chicken. Once hot, bake the tenders for 12-15 minutes, flipping halfway through, until they're golden brown and reach an internal temperature of 165°F. The edges should be crispy while the centers remain juicy - you'll know they're perfect when they pull away from the pan easily and the breading has a deep golden color.
Serve Immediately with Fresh Herbs
Transfer the baked tenders to a serving platter and sprinkle with additional chopped fresh thyme and rosemary for a pop of color and fresh flavor. Serve while hot, with your favorite dipping sauce or a simple lemon aioli made from any leftover marinade.
These tenders are best enjoyed immediately while the coating is still crisp. If you need to hold them, tent loosely with foil for up to 10 minutes to keep them warm without making the breading soggy. The combination of tender chicken, crispy coating, and aromatic herbs makes these a standout appetizer or main dish any time of day.
Pro Tips For Making Baked Marinated Chicken Tenders
- Pound Chicken Thin: Use a meat mallet or rolling pin to flatten the breasts to even ½-inch thickness—this guarantees they cook through without drying out. I learned this the hard way after pulling apart rubbery tenders that spent too long in the oven.
- Marinate Overnight: Skip the rush and let the chicken soak up the lemon, olive oil, and thyme for at least 6 hours (or overnight). The acid tenderizes better, and the garlic flavor seeps in deeper—no need to overcrowd the pan later.
- Bake at 400°F: High heat is non-negotiable—this recipe needs 400°F to develop a crispy edge while keeping the inside juicy. I used to bake at 375°F and ended up with sad, soggy tenders every time.
- Rest Before Serving: Pull the chicken off the tray and tent loosely with foil for 5 minutes. This lets the juices redistribute—cutting into it too soon means dry, stringy bites, and nobody wants that.
Essential equipment for this recipe
Baking Sheet Essentials
Start with a heavy-duty baking sheet—I recommend All-Clad Stainless Steel or USA Pan for even heat distribution and durability. The rimless design prevents breading from sticking to the edges, while the thick gauge ensures no warping at 425°F.
Line it with parchment paper (like Reynolds Unbleached Parchment) for easy cleanup and even browning. Pro tip: Use two sheets if baking more than 12 tenders at once to avoid crowding.
For extra crispiness, I swear by wire cooling racks (like OXO Good Grips) placed underneath the baking sheet. This allows hot air to circulate on both sides, creating that perfect golden crust without steaming the breading.
If you don’t have one, prop the sheet on a folded towel to elevate it slightly. 🌡️
Coating Tools
A fine-mesh strainer (like OXO Good Grips) is perfect for draining excess marinade from the chicken before breading. I also keep a small offset spatula (like Mercer Culinary) handy to press breadcrumbs firmly onto each tender—this ensures they stick and crisp up beautifully.
For the flour mixture, a shallow glass or ceramic dish (like Corelle) works best because it’s nonporous and easy to wipe clean.
Don’t skip the paper towels—I use Bounty for their absorbency to pat the chicken dry after marinating. This step is non-negotiable for that crispy seal between the chicken and breading. Keep a stack nearby while breading to avoid soggy results. 💪
Oven Thermometer
Your oven’s temperature display can be off by 25°F or more, and that’s a game-changer for these tenders. I always use a Thermoworks Thermapen to confirm 425°F before baking. If your oven runs hot, reduce the temperature to 400°F to prevent burning the breading while the chicken cooks through.
For even cooking, place the sheet on the middle rack—this ensures consistent heat circulation.
If you’re baking in a convection oven, reduce the temperature by 25°F (to 400°F) and bake for 10-12 minutes instead. Convection fans speed up cooking, so monitor closely to avoid over-browning. 🔥
Optional Upgrades
For a restaurant-style finish, invest in a small kitchen torch (like Weck Torch) to torch the tops of the tenders for 30 seconds after baking. This adds a smoky char and extra crispiness.
I also love using a mini food processor (like Cuisinart DLC-2A) to pulse panko breadcrumbs into finer pieces for an ultra-crispy texture.
No torch? A broiler setting on high for 1-2 minutes at the end works in a pinch—just watch closely to avoid burning. For meal prep, grab silicone baking cups (like OXO Good Grips) to portion tenders individually before freezing. These are lifesavers for grab-and-bake lunches! ✨
Nutrition facts
Frequently asked questions
Can I use chicken thighs instead of breasts for this recipe?
Chicken thighs stay juicier and are more forgiving if slightly overcooked. Use bone-in, skin-on thighs for extra flavor and moisture, or stick with boneless thighs for convenience. Adjust baking time to 18-22 minutes (thighs cook slower) and check for 165°F internal temperature. The skin will crisp beautifully, adding another flavor layer.
How do I prevent the breading from getting soggy?
The key is keeping everything cold until baking. Pat the chicken very dry after marinating, and work in batches if needed. Preheat your oven fully before adding the tenders, and bake on the middle rack for even heat. For extra insurance, broil for 1-2 minutes at the end to reset the breading's crispiness.
Can I make this recipe ahead of time?
Yes! Marinate the chicken overnight for maximum flavor, then bread and refrigerate unbaked tenders on a tray for up to 24 hours. Bake straight from the fridge, adding 2-3 extra minutes to the cooking time. For make-ahead meals, freeze breaded tenders (unbaked) in a single layer on a tray, then transfer to a bag for 2 months. Bake from frozen at 400°F for 20-25 minutes.
What's the best way to reheat leftover tenders?
Reheat in a 375°F oven for 5-7 minutes with a splash of water in the pan to restore moisture. For microwave reheating, cover with a damp paper towel and heat for 20-30 seconds. Never reheat breaded items in the microwave without moisture—they'll turn rubbery. Air fryers work beautifully too at 350°F for 3-4 minutes.
Can I substitute panko with regular breadcrumbs?
Regular breadcrumbs will work, but they won't be as crispy. Toast them in a dry pan for 2-3 minutes first to improve texture. For best results, pulse them in a food processor to create finer, more even pieces. The cornstarch in the recipe helps compensate—just press the coating extra firmly onto the chicken to ensure adhesion.