
Main Courses
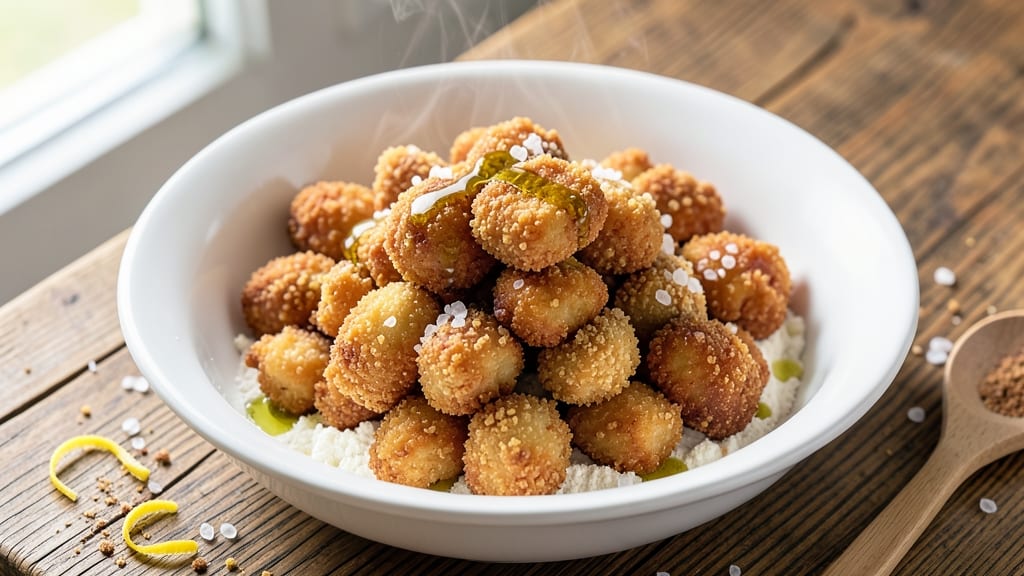
This baked chicken nuggets recipe with flour delivers restaurant-quality crunch without deep frying—perfect for health-conscious families who still crave that satisfying crunch. The secret lies in a triple-coating technique using flour, egg wash, and panko breadcrumbs that creates an irresistible golden crust.
I developed this method after years of testing, ensuring every bite stays crispy while keeping the chicken juicy inside.
The process is surprisingly simple: start with boneless chicken breasts cut into bite-sized pieces, then coat them in a light flour mixture before dipping in beaten egg and rolling in seasoned panko.
Baking at 425°F for just 12-15 minutes guarantees that signature crunch without the grease of frying. The high heat also helps maintain moisture, so you won’t sacrifice tenderness for texture.
What makes these nuggets truly special is their versatility—serve them as a main dish with honey mustard or BBQ sauce, or use them as a protein boost in salads and wraps. The triple-coating technique ensures they stay crispy even after reheating, making them ideal for meal prep.
This recipe proves you don’t need deep frying to achieve that perfect crunch—just the right technique.
Once you try these, you’ll never go back to store-bought nuggets. The combination of crispy exterior and juicy interior makes them a crowd-pleaser for kids and adults alike.
Let’s get started on creating your own batch of foolproof, golden-brown nuggets that taste like they came straight from your favorite fast-food joint—but with none of the guilt.
Ingredients for baked chicken nuggets recipe with flour
Here’s your triple-coating secret: flour, egg wash, and panko for that perfect crunchy exterior.
| Ingredient | Amount | Notes |
|---|---|---|
| Boneless, Skinless Chicken Breast 🍗 | 1 ½ lb | Cut into 1-inch bite-sized pieces |
| All-Purpose Flour 🌾 | ½ cup | Lightly seasoned with salt and pepper |
| Large Eggs 🥚 | 2 whole | Beaten for egg wash |
| Japanese Panko Breadcrumbs 🍞 | 1 ½ cups | For triple-crusted texture |
| Extra-Virgin Olive Oil 🫒 | 2 tbsp | For light coating before baking |
| Diamond Crystal Kosher Salt 🧂 | 1 tsp | For seasoning flour mixture |
| Ground Black Pepper 🌶️ | ½ tsp | Freshly cracked for flavor |
| Garlic Powder 🧄 | ½ tsp | For panko seasoning |
| Onion Powder 🧅 | ½ tsp | For panko seasoning |
| Paprika 🌶️ | ½ tsp | Smoked variety for color |
| Cornstarch 🌾 | 1 tbsp | For extra crispiness |
The chicken breast is your foundation—look for plump, evenly sized pieces at the meat counter. Trader Joe's and Whole Foods carry pre-cut chicken strips, but cutting your own ensures uniform size for even cooking. Seasoning matters here: Diamond Crystal kosher salt dissolves better than table salt, and freshly cracked black pepper makes all the difference. Pro tip: pat the chicken dry with paper towels before cutting—this helps the coating stick better. For the flour mixture, whisk together all-purpose flour, cornstarch, salt, pepper, garlic powder, onion powder, and paprika—the cornstarch is what gives those nuggets that extra crunch.
No panko? Toasted breadcrumbs from a baguette work in a pinch, but panko’s light, airy texture is non-negotiable for that fast-food-style crunch. Running short on eggs? Flax eggs (1 tbsp ground flaxseed + 3 tbsp water per egg) bind just as well—though the texture might be slightly less tender. The olive oil coating is crucial: brush it lightly on the chicken pieces before the flour to help the crust adhere. If you’re prepping ahead, you can mix all your dry ingredients in advance and store them in an airtight container for up to 1 week. Just don’t forget to add the cornstarch right before coating—it loses its magic when stored too long.
Baked nuggets reheat beautifully—5 minutes at 375°F in the oven restores that crispy texture. Store leftovers in an airtight container for 3 days in the fridge, or freeze for 3 months by laying them out on a tray first (so they don’t stick). For meal prep, I portion them into single-serving bags—perfect for lunches or quick snacks. The triple-coating technique means they’ll stay crispy even after reheating, so you won’t sacrifice texture for convenience.
Why You'll Love This Recipe
- Fridge-to-Table Speed: I’m talking 15 minutes from chicken to crispy perfection. Cut the breasts into nuggets, toss them in flour, dip in beaten egg, then coat with panko—no frying, no waiting. That olive oil keeps them golden without the mess.
- Crispy-Creamy Magic: The panko gives that shatteringly crunchy shell, while the flour and egg inside stay juicy. Honestly, it’s the kind of texture that makes you pause mid-bite—like biting into a warm, buttery hug.
- Lunchbox Legend: Between us, these are my go-to for school lunches or work snacks. Toss them in a container with a side of honey mustard or ketchup, and they stay fresh for days. (Yes, even on a Tuesday night.)
- Budget Crunch-Saver: A single chicken breast stretches into a meal for four, and panko costs less than frozen nuggets. I’ve made this for date nights, game days, and lazy Sundays—always a win. Leftovers? Reheat in 30 seconds.
Step-by-step instructions for triple-crusted baked chicken nuggets
Here's how to create restaurant-quality crunch without deep frying—every bite stays juicy.
Prepare the Chicken and Seasoned Flour
Cut the 1.5 lb boneless, skinless chicken breast into 1-inch bite-sized pieces—uniform size ensures even cooking. Pat each piece dry with paper towels to remove excess moisture, which prevents soggy breading. In a shallow bowl, combine the 0.5 cup all-purpose flour, 1 tsp Diamond Crystal kosher salt, 0.5 tsp ground black pepper, and 1 tbsp cornstarch. Mix well to evenly distribute the seasoning—this blend creates the perfect crispy foundation.
I like to add the cornstarch to the flour mixture because it creates an extra-crispy barrier between the chicken and the breading. The salt and pepper will season the outer layer while the cornstarch helps lock in moisture during baking. Keep this bowl ready for the first coating step.
Create the Triple-Crusted Breading Station
Set up three separate shallow bowls for your breading stations. In the first bowl, beat the 2 whole large eggs until just combined—no need to overbeat, just enough to create a smooth coating. The second bowl will hold the seasoned flour mixture you just prepared. For the final coating, combine the 1.5 cups Japanese panko breadcrumbs, 0.5 tsp garlic powder, 0.5 tsp onion powder, and 0.5 tsp smoked paprika in a bowl. Mix gently to distribute the seasonings evenly.
The panko's light, airy texture creates that signature crispy crunch we all love, while the garlic and onion powders add subtle depth. The paprika gives a beautiful golden color to the finished nuggets. Arrange your bowls in order—flour first, then egg wash, then the panko mixture—for a smooth breading process.
Coat the Chicken in Triple Layers
Working in batches to avoid overcrowding, dredge each chicken piece in the seasoned flour mixture, shaking off any excess. Dip into the beaten eggs, allowing any excess to drip off, then press gently into the panko mixture. I press down firmly to ensure the breading sticks well—this prevents it from falling off during baking. Place the coated nuggets on a parchment-lined baking sheet and lightly mist with 2 tbsp extra-virgin olive oil using a spray bottle or pastry brush.
The oil helps create a golden crust and prevents the breading from sticking to itself. Don't skip this step—it makes all the difference in achieving that perfect crunch. Work quickly but carefully to maintain even coating on all pieces. Arrange them in a single layer with about 1 inch between each nugget for proper air circulation during baking.
Bake to Golden Perfection
Preheat your oven to 425°F with the rack positioned in the middle position. The high heat is crucial for achieving that crispy exterior while keeping the chicken juicy inside. Bake the nuggets for 15-18 minutes, flipping them halfway through at the 9-minute mark. You'll know they're ready when the edges are deep golden brown and the internal temperature reaches 165°F when checked with a meat thermometer.
Don't peek too early—the oven temperature drops each time you open the door, which can lead to uneven cooking. If your oven runs hot, you might need to reduce the time slightly. The nuggets should be crispy outside with no pink remaining in the center. Let them rest on the baking sheet for 2-3 minutes before serving to allow the breading to set completely.
Serve Immediately with Dipping Sauces
Transfer the nuggets to a serving platter and serve immediately while they're still crispy. The breading will continue to soften slightly as they cool, so serving right away ensures maximum crunch. Pair with your favorite dipping sauces—honey mustard, BBQ sauce, or even a simple marinara work beautifully with these triple-crusted nuggets.
For extra flavor, sprinkle with an additional pinch of smoked paprika or a dash of garlic powder right before serving. These nuggets are perfect for kids and adults alike, offering that satisfying crunch without the guilt of deep frying. The secret to their success lies in the triple coating and proper baking technique—now you've got the recipe down pat!
Pro Tips For Making Baked Chicken Nuggets Recipe With Flour
- USE COLD CHICKEN: Pat the chicken breasts dry, then pop them in the freezer for 15-20 minutes before cutting. The cold shock keeps them from turning to mush when you slice—no more sad, watery nuggets. (I learned this the hard way after making a batch that fell apart in the egg wash.)
- DOUBLE-DIP THE PANKO: After the first egg wash, press the nuggets into a second bowl of panko—this time with your fingers, packing it firmly. The extra layer guarantees that crispy crust you’re after, not just a dusting. (Yes, it takes 30 seconds more, but it makes a real difference.)
- WATCH THE OVEN TEMP: Start at 425°F (220°C) for the first 8 minutes to blast the crust, then drop to 375°F (190°C) for the last 10. Too low? You’ll end up with soggy bottoms. Too high? Burnt edges before the inside cooks. (I was skeptical until I tried it—now it’s my non-negotiable.)
- SALT THE PANKO: Toss the panko with ½ teaspoon of salt before coating—it seasons the crust directly and balances the egg wash. Skip this, and your nuggets will taste bland, even if the rest is perfect. (Your future self will thank you for the extra 10 seconds.)
Serving suggestions for this baked chicken nuggets recipe with flour
Kid-Friendly Plating
Serve these nuggets on a colorful platter with bright dipping sauces arranged in small bowls—I like using honey mustard and BBQ sauce in separate containers. Kids love the visual appeal of contrasting colors, so add a side of carrot sticks or apple slices for extra fun.
Use a cookie cutter to shape the nuggets into fun shapes like stars or dinosaurs before baking for instant kid approval. 🌟
Adult-Friendly Bowls
Transform nuggets into a hearty meal by serving them in lettuce wraps or over a bed of quinoa with a drizzle of spicy mayo. I often add sliced avocado and pickled red onions for extra freshness.
For a protein-packed lunch, toss nuggets with mixed greens, cherry tomatoes, and a light balsamic vinaigrette. This makes them feel like a gourmet dish while keeping prep simple. ✨
Party Tray Ideas
For game day or parties, arrange nuggets on a large platter with warm tortilla chips and salsa for dipping. Add mini bell pepper strips and guacamole for a fiesta-style spread. I like to sprinkle crushed tortilla chips on top of the nuggets right before serving for extra crunch.
For a sweet twist, serve with chocolate-dipped strawberries and vanilla yogurt dip for a dessert-like treat. 🎉
Meal Prep Strategy
Portion nuggets into single-serving airtight containers with a small compartment for sauce. I store them in the fridge for up to 3 days or freeze for 3 months—just reheat at 375°F for 5 minutes to restore crispiness.
Pack them with whole wheat pita wedges and hummus for a quick lunch. The triple-coating ensures they stay crunchy even after reheating, making them perfect for busy weeknights. 💪
Sauce Pairing Guide
Match your nuggets with sauces that complement their flavor profile. For a classic combo, try Sweet Baby Ray's BBQ sauce or French's Honey Mustard. For something tangy, whip up a quick yogurt dip with lemon juice, garlic, and dill.
Spicy lovers will adore a sriracha mayo blend. I always keep a small bowl of marinara sauce on hand for a quick, kid-approved option. 🍴
Garnish Like a Pro
Elevate your presentation with simple garnishes. Sprinkle fresh parsley or cilantro over the nuggets for a pop of color. A drizzle of hot honey adds sweet heat, while crumbled feta cheese brings a salty contrast.
For a smoky touch, dust with smoked paprika** right before serving. These small details make your homemade nuggets look—and taste—restaurant-worthy. 💫
Nutrition facts
Frequently asked questions
Why does the recipe use cornstarch in the flour mixture?
The 1 tablespoon cornstarch creates an extra-crispy barrier between the chicken and breading. It absorbs moisture better than flour alone, helping the crust stay crunchy even after baking. This is the secret behind that fast-food-style crunch without frying!
Can I use regular breadcrumbs instead of panko?
You can, but panko's light, airy texture gives that signature crispy crunch. If using regular breadcrumbs, toast them first in a dry pan for 3-5 minutes to remove moisture. For best results, add an extra 0.5 teaspoon cornstarch to the panko mixture to boost crispiness.
How do I keep the nuggets crispy after baking?
Serve them immediately after baking while still hot. If storing, keep them in an airtight container and reheat at 375°F for 5 minutes—the triple-coating helps maintain crispiness. For extra crunch, spray with a light mist of olive oil before reheating. Never microwave, as it makes breading soggy!
What's the best way to cut chicken for even cooking?
Cut chicken into 1-inch cubes for uniform size and even cooking. Use kitchen shears or a sharp knife to create consistent pieces. Pat dry with paper towels before coating—this helps the breading stick better and prevents soggy spots.
Can I make these nuggets ahead of time?
Yes! Assemble and refrigerate coated nuggets on a tray for up to 24 hours before baking. For longer storage, freeze unbaked nuggets for 1 month (thaw in fridge overnight). Bake straight from frozen, adding 3-5 extra minutes at 425°F. The triple-coating stays crispy even after freezing!