
Main Courses
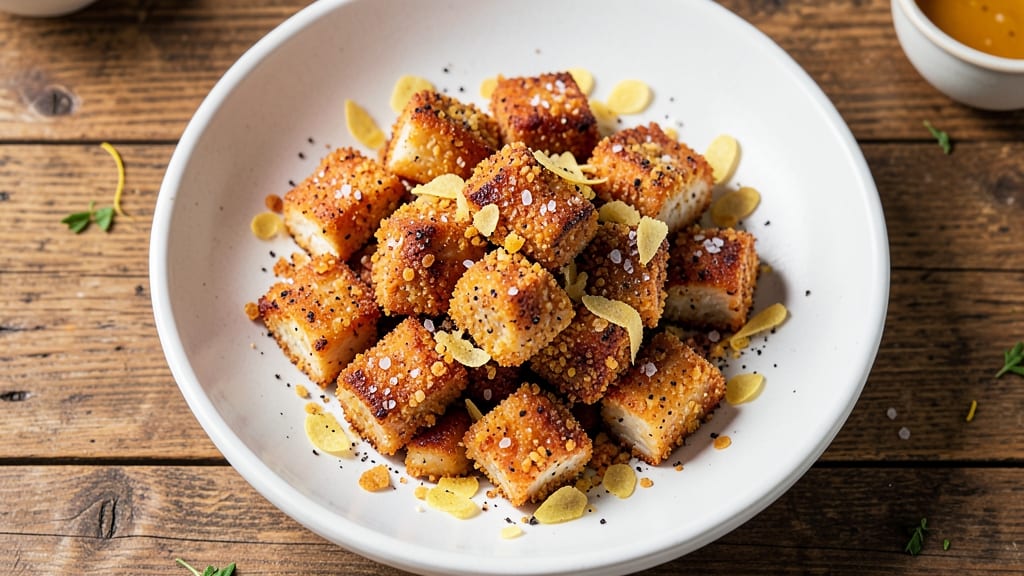
Baked chicken cubes transform into irresistibly crispy, buttery bites when coated in crushed cornflakes and baked to golden perfection. This technique delivers restaurant-quality crunch without frying, making it a foolproof method for weeknight dinners or game day appetizers. The secret lies in proper cutting and baking temperature—high heat ensures that crispy exterior while keeping the chicken juicy inside.
Start with evenly sized cubes for consistent cooking, then coat them thoroughly in a mixture of crushed cornflakes, melted butter, and seasonings. Baking at 425°F for about 20-25 minutes creates that signature crunch, while the cornflake crust adds satisfying texture with every bite.
The buttery flavor pairs perfectly with tangy dipping sauces like honey mustard or spicy ranch.
What you'll end up with is a batch of crispy, golden chicken cubes that hold their shape and deliver that satisfying crunch in every bite. The cornflake coating stays crispy even when served warm, making these perfect for sharing or meal prepping.
This method elevates simple chicken into something special that's sure to become a family favorite.
Serve these with your favorite dipping sauce for a complete appetizer or add them to salads for extra protein and crunch. The recipe scales easily for crowds, and the prep is straightforward enough for beginners. Let's get started!
Ingredients for baked chicken cubes
Eleven essential ingredients transform simple chicken into restaurant-worthy crispy bites.
| Ingredient | Amount | Notes |
|---|---|---|
| Boneless, Skinless Chicken Breast 🍗 | 1 ½ lb | Cut into 1-inch cubes for even cooking |
| Cornflakes 🍞 | 1 ½ cups | Crushed into fine crumbs (not pre-crushed) |
| Unsalted Butter 🧈 | ½ cup | Melted and cooled slightly for coating |
| Diamond Crystal Kosher Salt 🧂 | 1 tsp | For seasoning chicken and coating |
| Ground Black Pepper 🌶️ | ½ tsp | Freshly ground for optimal flavor |
| Garlic Powder 🧄 | ½ tsp | Enhances buttery flavor profile |
| Onion Powder 🧅 | ½ tsp | Adds subtle depth to coating |
| Paprika 🌶️ | ½ tsp | Smoked variety for extra richness |
| All-Purpose Flour 🌾 | ¼ cup | For light dusting between layers |
| Lemon Juice 🍋 | 1 tbsp | Brightens flavor after baking |
| Fresh Parsley 🌿 | ¼ cup | Chopped for garnish (optional) |
The chicken breast is critical—boneless, skinless cuts ensure even cooking and maximum crispiness. Look for plump, firm breasts with good marbling at your local butcher or grocery store's meat department. Trader Joe's and Whole Foods often carry high-quality cuts, but any reputable supermarket will do. Cutting the chicken into 1-inch cubes is non-negotiable for consistent texture; use a sharp chef's knife for clean cuts. The cornflakes should be crushed by hand in a heavy-duty bag with a rolling pin for maximum crunch—pre-crushed varieties lack texture.
No cornflakes? Crushed potato chips or panko breadcrumbs work in a pinch, though texture will differ. The butter must be melted but not hot when coating—microwave in 20-second bursts to avoid overheating. For extra flavor, swap half the butter for olive oil (use extra-virgin for richness). The seasoning blend is flexible: substitute smoked paprika with regular if unavailable, or add 1/4 tsp cayenne for heat. The lemon juice should be freshly squeezed—bottled versions lack brightness and can make the coating soggy.
Store prepped chicken cubes in an airtight container between layers of parchment paper to maintain crispiness for up to 2 days in the fridge. For longer storage, freeze unbaked cubes on a tray before transferring to a bag—this prevents clumping. Reheat at 375°F for 10-12 minutes or until internal temp reaches 165°F. The coating stays crispy when reheated properly, making these perfect for meal prep. Garnish with parsley right before serving to preserve its vibrant color and fresh flavor.
Why You'll Love This Recipe
- No-Cube Cutting Needed: I’ll be real—this recipe saved me from endless chopping. Just slice the chicken breasts into even strips (no perfect cubes required), and you’re done. The cornflake crust sticks like magic, even if the pieces aren’t uniform.
- Crunchy Without the Breading: That buttery cornflake crust? It’s ridiculously good—crispy on the outside, tender inside. No soggy breading here; just melt-in-your-mouth chicken with a satisfying crunch that disappears in seconds.
- Lunchbox Hero: Between us, these are my kids’ favorite school lunch. Cold or at room temp, they hold up perfectly—no reheating needed. Toss them in a container with a little salt, and they’ll eat them faster than I can pack the bag.
- Budget Crunch Saver: Chicken breast is lean, but this method stretches it further. A single pan, minimal ingredients, and zero waste—just repurpose leftovers into salads, wraps, or next night’s stir-fry. My wallet (and my fridge) thank me.
Step-by-step instructions for crispy cornflake-coated chicken cubes
Master this technique and you'll achieve restaurant-quality crunch with juicy, flavorful chicken every time.
Prepare the Chicken and Seasoning
Cut the 1.5 lb boneless, skinless chicken breast into 1-inch cubes for even cooking. Arrange the cubes in a single layer on a baking sheet and pat them completely dry with paper towels—this ensures maximum crispiness when coating. In a small bowl, combine the 1 tsp Diamond Crystal kosher salt, 0.5 tsp ground black pepper, 0.5 tsp garlic powder, 0.5 tsp onion powder, and 0.5 tsp paprika. Sprinkle this seasoning evenly over the chicken cubes, pressing it gently into the surface so it adheres well.
Let the seasoned chicken sit at room temperature for 15 minutes while you prepare the coating. This brief rest ensures even cooking and prevents cold spots in the center. The seasoning mixture creates a flavor foundation that will develop further during baking, so don't skip this step—it makes all the difference in the final result.
Create the Crispy Cornflake Coating
In a food processor or strong blender, pulse the 1.5 cups cornflakes until they form fine, even crumbs—about 20-30 seconds of processing. Transfer these crumbs to a shallow dish and set aside. In a separate bowl, combine the 0.25 cup all-purpose flour with the crushed cornflakes to create a uniform coating mixture. The flour helps bind the crumbs to the chicken while adding a subtle lightness to the texture.
Melt the 0.5 cup unsalted butter in a microwave-safe bowl for 30-45 seconds until completely liquid, then let it cool slightly for 5 minutes until it reaches a warm but not hot temperature. This cooled butter will create a perfect adhesive for the cornflake mixture, ensuring each cube gets an even, crispy crust without becoming greasy.
Assemble and Bake for Maximum Crunch
Working in batches if needed, dip each seasoned chicken cube into the melted butter, allowing any excess to drip off. Then roll the buttered cube in the cornflake mixture, pressing gently to ensure complete coverage. Place the coated cubes on a parchment-lined baking sheet, spacing them about 1 inch apart to allow for even browning. Preheat your oven to 400°F while you assemble all the cubes—this high temperature is crucial for achieving that signature crispy texture.
Bake the chicken cubes for 18-22 minutes, rotating the baking sheet halfway through, until they're deep golden brown and the internal temperature reaches 165°F. The edges should be crispy with a slight crunch, while the chicken inside remains juicy. If you notice the coating browning too quickly before the chicken is fully cooked, tent the baking sheet with foil for the last 5 minutes to prevent burning while still allowing the chicken to finish cooking through.
Finish with Lemon and Garnish
Remove the chicken cubes from the oven and immediately drizzle with 1 tbsp lemon juice. This bright citrus note cuts through the richness of the butter and cornflakes, adding a refreshing contrast that balances the flavors. Let the cubes rest for 3-5 minutes before serving—this brief resting period helps the cornflake coating set slightly, making it even more satisfying when you bite into that crispy exterior.
Garnish with chopped fresh parsley if desired, though this is optional. The parsley adds a touch of freshness and visual appeal, but the dish is delicious without it. Serve immediately while the cornflake coating is at its crispest, pairing with your favorite dipping sauce or alongside a fresh salad for a complete meal.
Pro Tips For Making Baked Chicken Cubes
- CUT CHICKEN SMALLER THAN YOU THINK: I learned this the hard way—oversized cubes mean uneven cooking and a sad, dry center. Aim for 1-inch chunks, not 1.5 inches. They’ll cook faster, crisp up better in the cornflake crust, and stay juicy inside.
- PULVERIZE CORNFLAKES FIRST: Skip the whole-crispy-bits approach—blend or pulse cornflakes into fine crumbs before mixing with butter. This creates a smoother, stickier coating that clings to the chicken instead of clumping into useless chunks. (Yes, even if it looks like you’re making baby food.)
- DON’T OVERMIX THE BREADING: Once you toss the chicken in butter and cornflake crumbs, stop after 30 seconds. Pressing too hard flattens the cubes, and over-tossing makes the crust slide off. A quick shake in a bag or bowl does the job—no need to go full Olympic lifter.
- BAKE IN BATCHES IF YOUR PAN’S CROWDED: I used to shove all the cubes on one sheet at once, and they’d steam instead of crisp. Work in two batches on separate pans if needed—spread them in a single layer with space between. The air needs to circulate, or you’ll get soggy, sad bites. (Your future self will notice.)
Make-ahead tips for this dish
Prep Ahead
Cut the chicken into 1-inch cubes and season them up to 24 hours ahead—store in an airtight container with parchment paper between layers. The seasoning will penetrate deeper, giving you more flavor when you bake.
I like to prep mine the night before so I can just coat and bake in the morning. 💪
Freezer-Friendly
For maximum convenience, freeze the seasoned chicken cubes on a tray lined with parchment paper for 1 hour to prevent sticking. Transfer to a freezer bag and store for up to 3 months.
When ready to bake, skip thawing—just add 5-7 extra minutes to the baking time to account for the cold start. The cornflake coating stays crispy even when baked from frozen!
Batch Baking
Double the recipe and bake in two batches to avoid crowding the pan. Use the same baking sheet for both batches without washing—just add 2-3 extra minutes to the second batch since the oven retains heat.
This is perfect for game day or parties where you need a crowd-pleasing appetizer ready quickly. 🍗
Reheating Crispiness
To revive the crunch after storing, reheat in a 400°F oven for 8-10 minutes—no microwave! The dry heat reactivates the cornflake coating. For extra crispiness, broil for 1-2 minutes at the end, watching closely to avoid burning. A quick spritz with lemon juice before serving restores that fresh-from-the-oven crunch.
Meal Prep Hack
Divide baked chicken cubes into single-serving portions in airtight containers with a paper towel on top to absorb moisture. Store in the fridge for up to 4 days—they stay crispy and ready for quick lunches or snacks.
I pack these in my lunchbox for a protein-packed, crunchy addition to salads or wraps. ✨
Sauce Pairings
Pre-make your favorite dipping sauces and store them separately. Honey mustard, spicy ranch, or a tangy sriracha mayo keep well in the fridge for 5 days. Serve the sauces on the side so everyone can customize their dip.
I like to make a big batch of ranch with Greek yogurt** for extra creaminess and protein.
Nutrition facts
Frequently asked questions
Can I use chicken thighs instead of breasts for this recipe?
Chicken thighs work beautifully and stay juicier during baking. For best results, cut them into 1-inch cubes and increase baking time by 3-5 minutes to reach 165°F internally. The extra fat in thighs adds richness, so you may want to reduce the butter in the coating by 1 tablespoon to prevent excess greasiness.
Why did my cornflake coating turn greasy instead of crispy?
Greasy coatings usually happen when the butter is too hot or the chicken isn't fully dry. Always let melted butter cool for 5 minutes before coating, and pat chicken cubes completely dry with paper towels. For extra crispiness, chill the coated cubes in the fridge for 15 minutes before baking to set the coating.
What are the best dipping sauces for these chicken cubes?
Classic choices include honey mustard, spicy ranch, or a tangy sriracha mayo. For something creamy, try mixing 1/4 cup Greek yogurt with 1 tbsp lemon juice and 1 tsp garlic powder. The buttery cornflake flavor pairs perfectly with anything slightly acidic or creamy to balance the richness.
Can I make this recipe air fryer-friendly?
Yes! Preheat your air fryer to 375°F and cook in batches for 8-10 minutes, shaking halfway. The air fryer creates crispiness with less butter needed—reduce the coating butter to 1/4 cup for lighter cubes. Watch closely after 7 minutes to prevent over-browning.
How do I keep the chicken cubes crispy when reheating?
Reheat in a 400°F oven for 8-10 minutes on a wire rack to allow air circulation. For extra crunch, broil for 1 minute at the end, then finish with a spritz of lemon juice. Never microwave—it makes the coating soggy. Store in an airtight container with a paper towel to maintain crispiness for up to 4 days.