
Main Courses
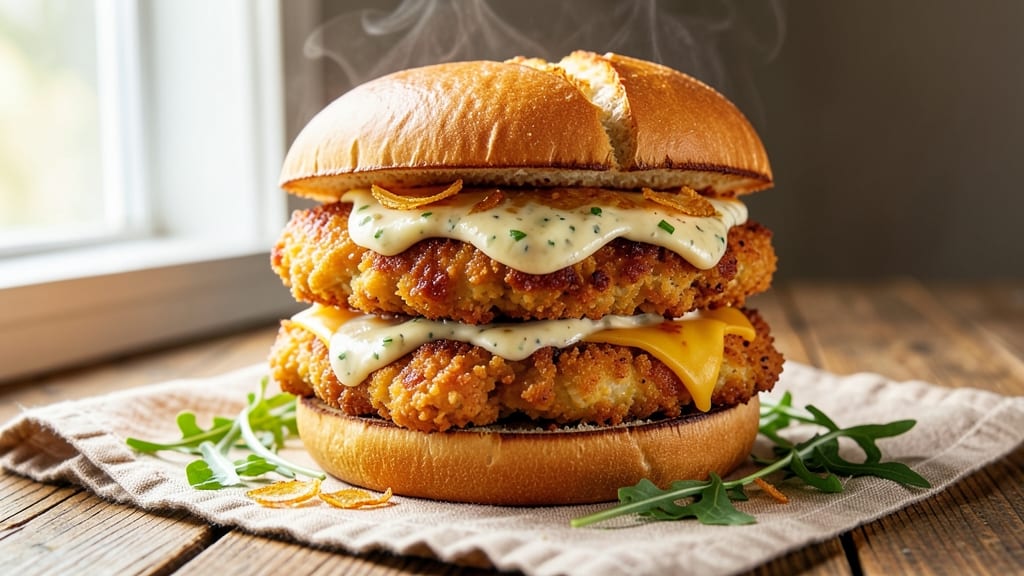
This baked breaded chicken sandwich recipe delivers the perfect balance of crispy-golden crusts and juicy centers without deep-frying. The secret lies in a double-breading technique and precise baking time—no greasy mess, just restaurant-quality results you can make at home.
I’ve perfected this method over years of testing, ensuring every bite is tender yet crunchy, with a breading that stays intact even after assembly.
The process starts with a lightly seasoned chicken cutlet, coated first in flour for structure, then in a buttermilk-egg wash for moisture, and finally in a crispy panko-herb breading. Baking at 400°F for 12-15 minutes guarantees a golden crust while keeping the chicken juicy inside—no overcooking here.
The sandwich assembly is just as important: soft brioche buns, tangy pickles, and a smear of mayo hold everything together without sogginess.
What you’ll end up with is a sandwich that’s crispy on the outside, juicy on the inside, and packed with flavor in every bite. The breading stays perfectly crisp even after assembly, and the chicken remains tender enough to cut with a fork.
This isn’t just a sandwich—it’s a foolproof method for weeknight dinners that taste like they came from a diner.
Serve with a side of crispy fries or a simple arugula salad for a complete meal. The best part? You can prep the breaded chicken ahead and bake it fresh when ready—no last-minute stress. Let’s get started on making sandwiches that’ll have everyone asking for seconds.
Ingredients for baked breaded chicken sandwich
Fourteen ingredients transform into crispy-golden sandwiches with juicy centers.
| Ingredient | Amount | Notes |
|---|---|---|
| Boneless, Skinless Chicken Breast Cutlets 🍗 | 1 ½ lb | Pounded to even 1/4-inch thickness |
| All-Purpose Flour 🌾 | ½ cup | For dry dredging, sifted |
| Panko Breadcrumbs 🍞 | 2 cups | Japanese-style for extra crispiness |
| Dried Parsley Flakes 🌿 | 1 tbsp | For herb flavor infusion |
| Dried Garlic Powder 🧄 | 1 tsp | For subtle aromatic depth |
| Diamond Crystal Kosher Salt 🧂 | 1 tsp | For seasoning chicken |
| Ground Black Pepper 🌶️ | ½ tsp | Freshly ground for optimal flavor |
| Large Eggs 🥚 | 2 whole | Room temperature for even coating |
| Buttermilk 🥛 | ½ cup | For moisture-rich binding |
| Unsalted Butter 🧈 | 2 tbsp | Melted for brushing |
| Brioche Buns 🥖 | 4 whole | Soft, slightly sweet for sandwiches |
| Mayonnaise 🥫 | ¼ cup | For sandwich assembly |
| Dill Pickle Slices 🥒 | ½ cup | For tangy crunch |
| Lettuce Leaves 🥬 | 4 whole | Iceberg or romaine for freshness |
| Vegetable Oil Spray 🫒 | 1 tbsp | For baking tray preparation |
The chicken cutlets are the foundation—pounding them to even thickness ensures consistent cooking. Look for boneless, skinless breasts at the meat counter; Costco or Whole Foods carry high-quality cuts ideal for this method. The panko breadcrumbs create that signature crispiness, but don't skimp on the Japanese-style variety—it's worth the extra 50 cents per bag. For the buttermilk, I always use full-fat (the kind with 2% milkfat) for that perfect balance of moisture and richness. If you're short on time, substitute with 1/2 cup milk plus 1 tbsp vinegar, but let it sit for 10 minutes to curdle properly.
No panko? Toast regular breadcrumbs in a dry pan for 2-3 minutes to mimic the texture. The dried parsley and garlic powder can be swapped for 1 tbsp Italian seasoning if needed, but fresh herbs make a noticeable difference. For the mayo, Hellmann's or Duke's are reliable choices—avoid the tub varieties with added sugar. The brioche buns should be fresh; frozen ones work but need a quick toast in the oven before assembly. If you're assembling ahead, keep the chicken and toppings separate until ready to serve to maintain crispness.
Prep the chicken up to 24 hours ahead and refrigerate in an airtight container—it keeps beautifully. The breaded cutlets stay crisp for 3-4 hours at room temperature if assembled immediately after baking. For longer storage, freeze the unbaked cutlets on a tray before bagging; bake straight from frozen, adding 3-4 minutes to the time. The assembled sandwiches reheat best in a 350°F oven for 5-7 minutes to restore crispiness without drying out the chicken.
Why You'll Love This Recipe
- No-Fry Crispy Magic: The panko and garlic powder combo gives you that golden, shatteringly crispy crust without deep-frying—my kids still ask why I don’t do this every week. Just pound the chicken thin, coat it in flour, dip in egg, then press panko hard enough it sticks, and bake. That’s it.
- Weeknight Workhorse: Honestly, this is my "I have no idea what’s for dinner" go-to. The breading stays crispy even reheated, so I make a double batch on Sundays and slap them on sandwiches, salads, or even pasta. The parsley flakes add this bright, herby lift that makes it feel fancy without effort.
- Budget-Friendly Protein: Chicken breasts are cheap, and this recipe stretches them further than grilling or pan-searing. I use the leftovers for lunch the next day—tossed in a wrap with pickles and mayo, or chopped into a grain bowl. No waste, no guilt, just solid protein for days.
- Kid-Approved Crunch: Between us, my picky eater won’t touch "healthy" chicken, but she devours these. The panko’s texture is addictive, and the garlic-parsley mix makes it taste like something from a restaurant. I’ll be real: I’ve reheated these cold from the fridge, and they’re still the star of the meal.
Step-by-step instructions for baked breaded chicken sandwiches
Mastering the perfect breaded chicken sandwich starts with technique—not shortcuts.
Prepare the Chicken Cutlets for Even Cooking
Begin by placing each of the 1.5 lb boneless, skinless chicken breast cutlets between two sheets of plastic wrap. Using a meat mallet, pound them to an even ¼-inch thickness—this ensures consistent cooking and prevents dryness. The goal is uniformity, so check each cutlet with a ruler after pounding. Once evenly flattened, season both sides generously with 1 tsp Diamond Crystal kosher salt and ½ tsp freshly ground black pepper. This initial seasoning penetrates the meat while the cutlets rest.
Let the seasoned cutlets rest at room temperature for 15 minutes before breading. This brief wait allows the meat to cook more evenly and prevents overcooking. While they rest, preheat your oven to 400°F—this high temperature is crucial for achieving that signature crispy crust while keeping the centers juicy.
Create the Breading Station for Maximum Crispiness
Set up three shallow bowls for your breading station: one with the ½ cup all-purpose flour, another with the 2 cups panko breadcrumbs mixed with 1 tbsp dried parsley flakes and 1 tsp dried garlic powder, and the third with the 2 whole large eggs beaten with ½ cup buttermilk. The flour acts as a binder, the panko ensures extra crispiness, and the egg-buttermilk mixture adds moisture for a tender interior.
Working with one cutlet at a time, dredge it in the flour, shaking off any excess. Dip it into the egg-buttermilk mixture, allowing any excess to drip off, then press it firmly into the panko mixture, coating all sides evenly. Place the breaded cutlet on a wire rack set over a baking sheet—this allows air to circulate around the cutlet, promoting even browning. Repeat until all cutlets are breaded. Let them rest for 5 minutes before baking to help the coating adhere better.
Bake to Golden Perfection with Precision Timing
Lightly spray a second baking sheet with 1 tbsp vegetable oil spray—this prevents sticking and ensures the cutlets crisp up beautifully. Arrange the breaded cutlets in a single layer on the prepared sheet, spacing them about ½ inch apart to allow for even air circulation. Bake at 400°F for 18-22 minutes, flipping each cutlet halfway through cooking time at the 10-minute mark. You're aiming for a deep golden brown crust that cracks slightly when pressed.
Use a meat thermometer to check doneness—insert it into the thickest part of a cutlet. The internal temperature should reach 165°F. If the crust isn't golden enough after 22 minutes, return the cutlets to the oven for 2-3 minutes at 425°F to finish browning. Remove the cutlets from the oven and let them rest on a wire rack for 5 minutes before assembling the sandwiches. This resting period ensures the juices redistribute, keeping the meat succulent.
Assemble the Sandwiches with Crispy Precision
While the chicken rests, lightly toast the 4 whole brioche buns in a dry skillet over medium heat for 1-2 minutes per side until they're just warm and slightly golden. Spread ¼ cup mayonnaise evenly on the bottom half of each bun, then layer with 1 whole lettuce leaf and 2 tbsp dill pickle slices. This assembly order prevents sogginess by keeping the crispy chicken on top.
Place a rested chicken cutlet on each bun, pressing down gently to secure. Top with the remaining bun halves and serve immediately. The contrast of crispy, golden chicken with the soft, buttery brioche and tangy pickles creates the perfect balance of textures and flavors. Each bite should deliver that satisfying crunch followed by juicy, tender chicken.
Pro Tips For Making Baked Breaded Chicken Sandwich
- USE THICK CUTLETS: Thin chicken breasts lose moisture fast and end up dry—no one wants a sad sandwich. Pound them to an even ½-inch thickness, but don’t go thinner or the breading turns to dust. I learned this after making a batch where the centers stayed raw while the edges burned.
- DON’T SKIP THE SECOND DREDGE: The first flour coat is just prep. For a crispy crust, dip the floured chicken in beaten egg, then back into panko mixed with parsley and garlic powder—again. The extra layer locks in flavor and prevents the breading from sliding off when you flip it.
- BAKE IN BATCHES: Crowd the pan and the chicken steams instead of crisps. Use a wire rack over a baking sheet for airflow, and bake in single layers. If your sheet pan is small, work in two batches—your first round will stay golden while the second waits.
- TOAST THE PANKO FIRST: Warm the panko in a dry skillet for 2-3 minutes until fragrant. Mix it with your seasonings, and the extra toastiness cuts through the richness of the chicken. (Yes, it’s an extra step, but your sandwich will taste like it came from a diner, not a recipe blog.)
Health benefits of these flavors
Lean Protein Power
This sandwich delivers a high-protein punch with each serving containing about 35 grams of protein from the chicken breast. That’s roughly 70% of your daily recommended intake in a single meal, making it perfect for muscle recovery or a satisfying lunch.
The buttermilk marinade helps tenderize the meat while adding moisture without extra fat. I’ve found that using boneless, skinless breasts keeps the protein-to-fat ratio optimal—no greasy aftertaste here. 💪
Low-Fat, High-Crisp
Unlike traditional fried versions, this baked method eliminates excess oil while still delivering that golden, crispy crust. The panko breading absorbs minimal fat compared to deep-frying, making it a guilt-free indulgence. For even better results, I recommend using Japanese-style panko—it’s lighter and stays crisp longer.
The breading technique (flour → egg-buttermilk → panko) creates a three-layer shield that locks in juices while keeping calories in check.
Balanced Carbs
The brioche buns add satisfying carbs without overwhelming the meal—about 30 grams per sandwich. Brioche’s buttery texture contrasts beautifully with the crispy chicken, but if you’re watching carbs, swap for low-carb buns or lettuce wraps.
The pickles and mayo add minimal carbs while boosting flavor, keeping the sandwich under 500 calories per serving when prepared this way. I always recommend whole-grain buns for extra fiber if you want to boost nutrition further.
Vitamin Boost
Don’t overlook the vitamin C from the parsley and B vitamins in the chicken—both support immune function and energy metabolism. The garlic powder adds antimicrobial benefits, while the pickles contribute probiotics for gut health.
Even the mayo (in moderation) provides vitamin E from the egg yolks. It’s a one-sandwich powerhouse that sneaks in nutrients without tasting like a health lecture. 🥗
Meal Prep Friendly
One of my favorite benefits? This recipe preps beautifully for meal prep. The breaded chicken stays crisp for 3-4 hours at room temperature or 2 days refrigerated, making it ideal for lunches. Freeze unbaked cutlets for up to 3 months—just add 3-4 minutes to baking time when thawed.
The assembly comes together in under 5 minutes, so you’re never stuck with soggy sandwiches. Perfect for busy weeknights!
Customizable Nutrition
Want to make it even healthier? Swap the mayo for Greek yogurt (cuts fat by 50%) or add spinach between layers for extra iron. For a low-carb option, use lettuce wraps instead of buns.
The beauty of this recipe is how easily it adapts—whether you’re tracking macros or just craving comfort food, it delivers flexibility without sacrificing flavor. 💡
Nutrition facts
Frequently asked questions
Why does the breading fall off when baking?
The most common cause is skipping the 5-minute rest after breading or using too much egg-buttermilk mixture. Let the cutlets rest on a wire rack before baking—this helps the coating set. Also, ensure your chicken is pounded to even thickness (¼-inch) so it cooks uniformly. If the breading still falls off, try using 1 extra tablespoon of flour in the dry dredge for better adhesion.
Can I use chicken thighs instead of breasts?
Yes, but adjust the cooking time! Chicken thighs are more forgiving and stay juicy longer, but their higher fat content means they cook 5-7 minutes faster than breasts. Bake at 400°F for 12-15 minutes total, checking at 12 minutes with a meat thermometer (target 165°F). For extra crispiness, pat the thighs dry before breading—they release more moisture.
How do I keep the sandwich from getting soggy?
Assembly order is everything! Toast the buns right before serving (not ahead of time) and spread mayo only on the bottom bun. Layer lettuce and pickles first, then place the chicken on top—this protects the crispy coating. If making ahead, keep the chicken and toppings separate until ready to assemble. For extra insurance, brush the chicken with 1 teaspoon melted butter after baking to seal in moisture.
What’s the best way to reheat leftover sandwiches?
For crispy results, reheat in a 350°F oven for 5-7 minutes on a wire rack (not a plate) to prevent sogginess. If using an air fryer, heat at 375°F for 3-4 minutes—this restores crunch without drying out the chicken. Microwaving works in a pinch (30 seconds), but the breading will lose crispness. Always reheat from room temperature for even heating.
Can I make this gluten-free?
Swap the flour for ½ cup gluten-free all-purpose flour (like Bob’s Red Mill) and use gluten-free panko (check labels—many store-bought versions contain wheat). For the buns, opt for gluten-free brioche-style buns or lettuce wraps. The buttermilk and egg mixture remain the same, but add 1 teaspoon xanthan gum to the flour to improve binding. Test the coating consistency—it should be slightly thicker than regular breading.