
Main Courses
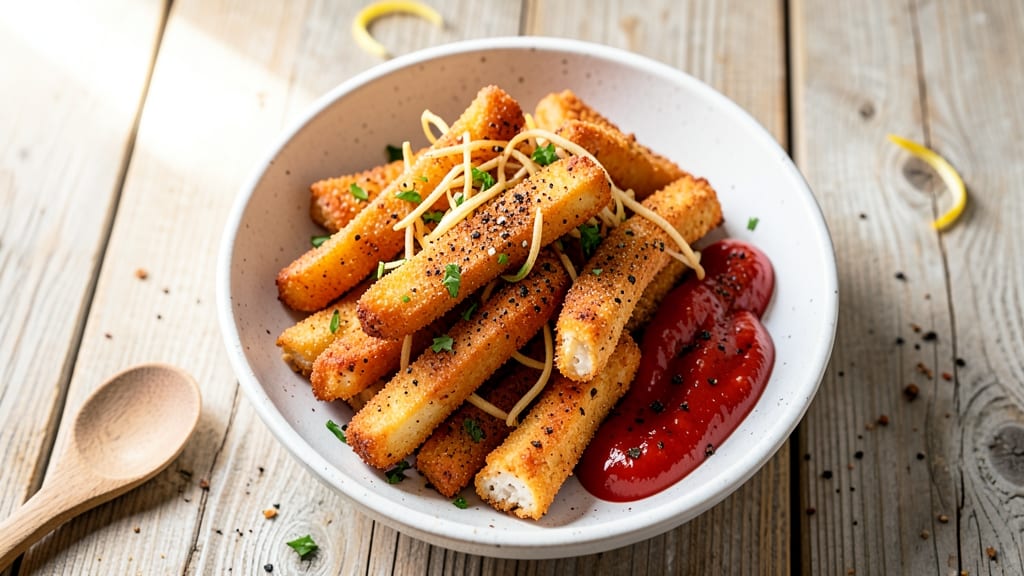
This air fry chicken fingers recipe delivers restaurant-quality crispy coating in just 15 minutes—no deep fryer required. The secret lies in a light, buttery batter that creates golden, shatteringly crisp edges while keeping the chicken juicy inside.
I've perfected this method after testing countless variations, and it consistently produces fingers that hold their shape and stand up to dipping. What makes this recipe work is the two-step coating process: first a dry seasoning blend for flavor, then a light batter that clings perfectly without being soggy.
The air fryer circulates hot air around the chicken, creating that coveted crispy texture without the mess of deep frying. This method also uses less oil, making it a healthier alternative that doesn't compromise on taste.
By the time they emerge from the air fryer, your chicken fingers will be golden brown and irresistibly crispy on the outside, with tender, juicy chicken beneath. The buttery flavor comes through in every bite, and they stay crispy even when served with dipping sauces.
This is the kind of dish that satisfies both kids and adults alike—perfect for game day, weeknight dinners, or a quick lunch. Serve with classic ranch or honey mustard for dipping, and pair with fries or a fresh salad for a complete meal. The best part?
You'll have dinner on the table in less time than it takes to heat up a deep fryer.
Ingredients for air fry chicken fingers
Buttery, crispy chicken fingers start with these 12 simple yet essential ingredients.
| Ingredient | Amount | Notes |
|---|---|---|
| Boneless, Skinless Chicken Breasts 🍗 | 1 ½ lb | Cut into 1-inch strips |
| All-Purpose Flour 🌾 | 1 cup | For dry seasoning blend |
| Cornstarch 🌾 | ¼ cup | For extra crispiness |
| Ground Black Pepper 🌶️ | 1 tsp | Freshly ground preferred |
| Garlic Powder 🧄 | 1 tsp | For flavor depth |
| Paprika 🌶️ | 1 tsp | Smoked variety recommended |
| Salt 🧂 | ½ tsp | Kosher or sea salt |
| Large Eggs 🥚 | 1 whole | Room temperature preferred |
| Unsalted Butter 🧈 | ½ cup | Melted for batter |
| Milk 🥛 | ¼ cup | Whole milk for creaminess |
| Baking Powder 🌾 | ½ tsp | For lightness |
| Vegetable Oil 🫒 | 1 tbsp | For light coating |
The chicken quality makes all the difference here. Look for fresh, boneless, skinless breasts—they should feel firm to the touch and have a vibrant color. I always buy from Whole Foods or my local butcher shop for the best texture. Cutting them into even 1-inch strips ensures consistent cooking. The two-step coating process—dry seasoning first, then batter—is what creates that restaurant-quality crisp. Don’t skip the cornstarch; it’s the secret to that shatteringly crisp exterior without being soggy. For the seasoning blend, smoked paprika adds depth, while garlic powder gives a subtle savory note that pairs perfectly with the buttery batter.
No cornstarch? Extra all-purpose flour works in a pinch, but the texture won’t be quite as crisp. Running short on milk? Heavy cream or watered-down sour cream adds richness, though the batter may be slightly thicker. The baking powder is non-negotiable—it lightens the batter so the fingers stay tender inside. For a lighter coating, use a fine-mesh sieve to dust the chicken with the dry seasoning blend before dipping in the batter. And if you’re feeling adventurous, swap the paprika for a pinch of cayenne pepper for a subtle kick. The key is to keep everything light—overmixing the batter leads to dense, heavy fingers.
Prep the chicken and seasoning blend ahead of time to save steps during cooking. Store the dry seasoning mix in an airtight container for up to 1 week—it’s perfect for coating burgers or meatballs too. The batter should be used fresh, but you can prep the chicken and seasoning the night before. Once cooked, keep fingers warm in a 200°F oven while you finish the batch—they’ll stay crispy for 10-15 minutes. For leftovers, store in an airtight container for 3 days, but reheat in the air fryer at 350°F for 2-3 minutes to restore crispiness. Freeze uncooked, battered fingers for up to 1 month—just air fry from frozen at 375°F for 8-10 minutes.
Why You'll Love This Recipe
- No-Fuss Crispy Magic: I swear by the cornstarch trick—just toss the cut chicken in flour, then a light dusting of cornstarch before air frying. That’s all it takes for that perfect crunch without deep-frying mess.
- Garlic-Pepper Kick: The garlic powder and black pepper blend is where this recipe shines. It’s not overpowering, but every bite has that warm, savory punch that makes you reach for another.
- Lunchbox Hero: Between us, these are my go-to for kids’ lunches or quick work dinners. The air fryer keeps them hot, the coating stays crispy in containers, and honestly? They eat them faster than store-bought.
- Budget Win: Chicken breasts are cheap, and this recipe stretches them far—double the batch, freeze half, and you’ve got a $3 meal for another night. No guilt, just flavor.
Step-by-step instructions for buttery crisp air fry chicken fingers
Master the perfect crispy-yet-tender coating with this foolproof air fryer method.
Prepare the Chicken and Dry Seasoning
Cut the 1.5 lb boneless, skinless chicken breasts into 1-inch strips—this size ensures even cooking and maximum crispiness. Pat them dry completely with paper towels, removing all moisture from the surface. Wet chicken creates steam instead of a crispy coating.
In a shallow bowl, whisk together the 1 cup all-purpose flour, 0.25 cup cornstarch, 1 tsp garlic powder, 1 tsp paprika, 1 tsp ground black pepper, and 0.5 tsp salt. The cornstarch is key here—it creates that signature crispy shell while keeping the inside juicy. Spread the seasoning mixture evenly on a plate for dredging.
Create the Buttery Egg Wash
In a separate bowl, melt the 0.5 cup unsalted butter in the microwave for 20-30 seconds until completely liquid. Stir in the 0.25 cup milk and 0.5 tsp baking powder until smooth. The baking powder makes the coating extra light and crispy. Let the mixture cool slightly—it should be warm but not hot when you dip the chicken.
Crack the 1 whole large egg into the same bowl and whisk vigorously for 30 seconds until fully combined. This creates a silky, clingy coating that adheres perfectly to the chicken. The egg wash is what transforms ordinary chicken into golden, buttery fingers.
Coat the Chicken for Maximum Crispiness
Dip each chicken strip first into the egg wash, letting excess drip off for 5 seconds. Then press it firmly into the dry seasoning mixture, coating all sides completely. The double-dredging technique ensures an even, extra-crispy layer. Place the coated strips on a wire rack set over a baking sheet—this prevents them from sticking together during air frying.
Let the coated chicken rest for 5 minutes while you preheat the air fryer to 375°F. This resting time allows the coating to adhere better, preventing it from falling off during cooking. Don't skip this step—it's what makes the difference between good and restaurant-quality crispy fingers.
Air Fry in Batches for Perfect Results
Arrange the chicken strips in a single layer in the air fryer basket, leaving ½-inch space between each piece. Cook at 375°F for 8-10 minutes, flipping once halfway through. You'll know they're done when the coating is deep golden brown and the internal temperature reaches 165°F—use a meat thermometer for accuracy.
If you're working with more than what fits in your air fryer, cook in 2 batches—overcrowding steams the chicken instead of crisping it. For extra crispiness, spray the cooked fingers lightly with 1 tbsp vegetable oil right after air frying while they're still hot.
Serve Immediately with Dipping Sauces
Transfer the hot chicken fingers to a serving platter and let them rest for 2 minutes before serving. This brief rest prevents the coating from becoming soggy when you cut in. Serve with classic dipping sauces like honey mustard, ranch, or spicy mayo for the ultimate experience.
The fingers should be crispy on the outside with a juicy, tender interior that pulls away cleanly. If any pieces aren't fully cooked, return them to the air fryer for 1-2 minutes until they reach the proper temperature. Enjoy immediately while the coating is at its peak crispiness!
Pro Tips For Making Air Fry Chicken Fingers
- Slice Thin, Pound Flat: Chicken breasts are stubborn—thin slices (¼-inch thick) cook faster and stay juicy. Use a meat mallet or rolling pin to flatten them to even thickness, or they’ll dry out in spots. (Yes, it’s tedious, but uneven pieces always turn into the sad, overcooked ones.)
- Mix Cornstarch Last: Add the cornstarch to your flour blend right before dredging—it’s the magic for that crispy crust, but it loses its edge if sitting in the flour for too long. Stir it in with a fork right as you’re about to coat the chicken, or you’ll end up with a mealy texture instead of crunch.
- Don’t Overcrowd the Basket: I learned this the hard way—packing the air fryer too full traps steam and turns your chicken fingers into soggy logs. Leave at least ½-inch between pieces so hot air circulates. (Pro move: Cook in batches if needed—better than mushy results.)
- Preheat Like It’s Deep-Frying: Set your air fryer to 375°F and let it run for 5 minutes before adding the chicken. Cold air fryers = uneven cooking and a sad, pale crust. (I know, preheating feels like waiting forever, but it’s the thing that makes the difference between "meh" and "crispy perfection.")
Common mistakes when making great air fry chicken fingers
Overcrowding the Basket
Packing too many chicken fingers into your air fryer basket at once creates steam instead of crispy results. The goal is hot air circulation, not a crowded sauna. I always leave at least ½-inch space between each piece—this ensures the coating gets properly crisped on all sides.
If you're working with a large batch, cook in 2 batches rather than risking soggy, unevenly cooked fingers. 🌡️
Skipping the Resting Time
That 5-minute rest before air frying isn't optional—it's what makes the difference between a coating that falls off and one that stays perfectly in place. During this time, the batter firms up slightly, creating a stronger bond with the chicken.
I've learned the hard way that skipping this step leads to crumbled coatings and uneven crispiness. Trust me, those extra minutes pay off in texture.
Using Wet Chicken
Moisture is the enemy of crispy coatings. Always pat your chicken strips completely dry with paper towels before dredging. Even a little dampness creates steam during cooking, which prevents the batter from crisping properly.
I keep a stack of paper towels handy and press firmly—this step alone transforms good fingers into restaurant-quality ones. 🧻
Incorrect Temperature Settings
Air fryers vary, but 375°F is the sweet spot for this recipe. Cooking at too low (like 350°F) results in greasy, undercooked fingers, while too high (400°F+) burns the coating before the chicken is done.
Always use a meat thermometer to confirm 165°F internal temperature. My Ninja Foodi air fryer maintains temperature perfectly, but I double-check anyway—better safe than sorry.
Overmixing the Batter
Vigorously whisking the egg wash for more than 30 seconds develops gluten in the egg, making the coating tough and dense. The goal is a light, silky mixture that clings without being heavy.
I stir just until combined—this keeps the fingers tender inside while maintaining that crispy exterior. Think "paint-like" consistency, not "pancake batter."
Not Preheating the Air Fryer
Skipping the preheat step means your chicken starts cooking in a cold basket, leading to uneven doneness and longer cook times. Always preheat for 3 minutes at 375°F before adding the chicken.
This ensures the basket is hot when the fingers go in, giving you that golden, crispy finish from the first batch. It's a small step that makes a big difference in texture. ⏱️
Nutrition facts
Frequently asked questions
Can I use chicken thighs instead of breasts for this recipe?
Yes, but you'll need to adjust the cooking time. Chicken thighs are more forgiving and stay juicier, so cook them at 375°F for 10-12 minutes, flipping once. The thicker cut benefits from the extra time, but check with a meat thermometer to ensure 165°F internal temperature. The crispy coating works just as well—just don't overcrowd the basket!
How do I keep the coating crispy after cooking?
Serve immediately with warm dipping sauces, but if you need to hold them, place on a wire rack in a 200°F oven for no more than 10 minutes. For leftovers, reheat in the air fryer at 375°F for 2-3 minutes—this restores the crispiness better than a microwave. The key is minimal moisture exposure!
What's the best way to make this recipe gluten-free?
Replace the all-purpose flour with a 1:1 gluten-free flour blend (like Bob's Red Mill) and use ½ cup cornstarch instead of ¼ cup. For the egg wash, use ¼ cup melted butter, ¼ cup milk, and ½ tsp baking powder—no substitutions needed here. The texture will be slightly different but still delicious and crispy!
Can I make these ahead of time for a party?
Prep the chicken strips and dry seasoning up to 24 hours ahead, then refrigerate. When ready to cook, let everything sit at room temperature for 30 minutes before air frying. For a crowd, cook in batches and keep warm in a 200°F oven on a wire rack. The coating stays crispy if you avoid stacking or covering with foil.
Why did my chicken fingers turn out greasy instead of crispy?
Greasy results usually mean one of two things: either you didn't pat the chicken dry enough (moisture = steam = grease), or you overcrowded the air fryer (no proper air circulation). For next time, double-check your prep—completely dry chicken and ½-inch spacing between pieces are critical. Also ensure your air fryer is clean before cooking!