
Main Courses
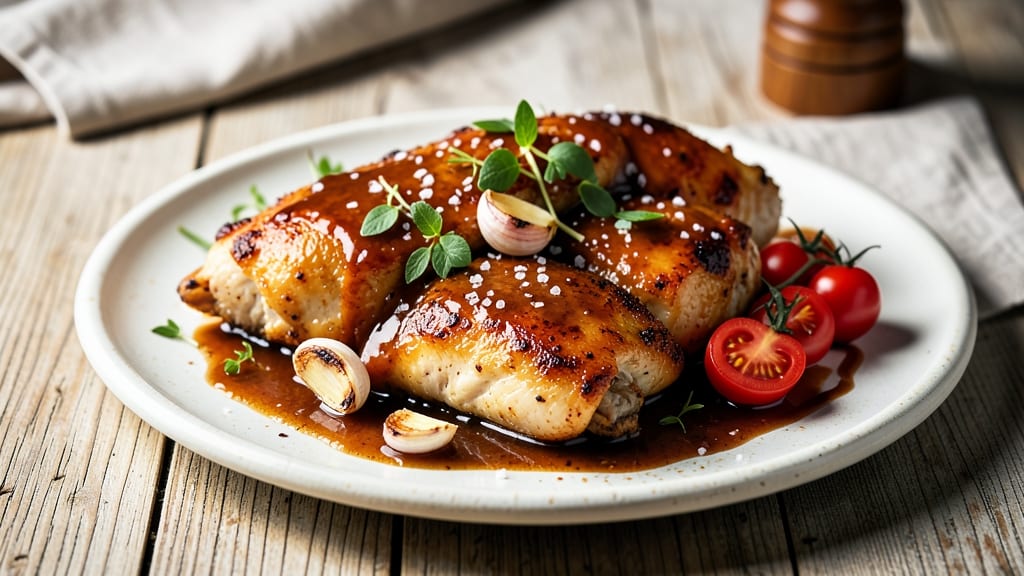
This baked boneless buffalo chicken recipe delivers all the bold, tangy flavor of classic wings—without the mess of bones or the need for deep-frying. 🔥 The secret lies in a foolproof marinating technique that tenderizes the chicken while infusing it with heat, and a baking method that guarantees crispy, golden edges every time.
I developed this version after years of perfecting restaurant-style buffalo chicken at home, and it's now my go-to for game day, weeknight dinners, or whenever I crave that signature spicy kick without the fuss.
The recipe starts with boneless, skinless chicken thighs—richer and more forgiving than breasts—marinated in a blend of hot sauce, melted butter, and a touch of brown sugar for balance. While the chicken bakes, the marinade reduces into a sticky, caramelized glaze that clings perfectly to each piece.
No deep fryer required, no messy bones to pick out, and no waiting for wings to cool enough to eat. The result? Juicy, tender chicken with a crispy exterior that's just as satisfying as its bone-in counterpart.
What sets this apart is the versatility—serve it straight from the oven with classic sides like celery sticks and ranch, or turn it into a restaurant-quality buffalo chicken dip by shredding the baked chicken and mixing it with cream cheese.
For a modern twist, try air-frying the chicken for an even crispier finish in half the time. The recipe scales effortlessly too, making it perfect for feeding a crowd or meal prepping for the week ahead.
Whether you're a seasoned cook or new to baking chicken, this method delivers consistent results with minimal effort. The key steps—marinating, baking at the right temperature, and letting the sauce reduce—are simple but critical for achieving that perfect balance of heat, tang, and tenderness.
Let's get started with a recipe that proves you don't need bones to make wings that wow.
Ingredients for baked boneless buffalo chicken
Fourteen ingredients deliver restaurant-style buffalo flavor without the deep-frying mess.
| Ingredient | Amount | Notes |
|---|---|---|
| Boneless, Skinless Chicken Thighs 🍗 | 1 ½ lb | Cut into 1-inch pieces for even cooking |
| Hot Sauce 🌶️ | ½ cup | Frank's RedHot preferred for authentic heat |
| Unsalted Butter 🧈 | ½ cup | Melted for marinade richness |
| Brown Sugar 🍚 | 2 tbsp | Light or dark variety works |
| Garlic Cloves 🧄 | 3 cloves | Minced for deep flavor infusion |
| Apple Cider Vinegar 🍎 | 1 tbsp | Balances heat with tanginess |
| Salt 🧂 | 1 tsp | Kosher or sea salt preferred |
| Black Pepper 🌶️ | ½ tsp | Freshly ground for best flavor |
| All-Purpose Flour 🌾 | 2 tbsp | For light coating before baking |
| Olive Oil 🫒 | 1 tbsp | For crispy baking finish |
| Butterflake Parsley 🌿 | 2 tbsp | Fresh for garnish (optional) |
| Ranch Dressing 🥛 | ½ cup | For serving (store-bought or homemade) |
The chicken thighs are non-negotiable here—thighs stay juicier than breasts during baking, and their natural fat content creates that signature crispy exterior. Costco sells pre-cut boneless thighs in bulk, saving time, but any grocery store carries them. Look for pieces that are similar in size (about 1-inch chunks) for even cooking. The thighs should be plump and pale pink, with just a thin layer of fat—trim any excess to prevent greasiness. For a shortcut, Trader Joe's sells pre-cut boneless thighs that work perfectly. If you're feeding a crowd, double the amount—this recipe scales beautifully.
No Frank's RedHot? Louisiana or Crystal hot sauce are excellent substitutes, though the heat level may vary. The butter is crucial for richness—don't use margarine, as it won't brown properly. Short on brown sugar? White sugar plus 1/2 tsp molasses mimics the flavor. The apple cider vinegar cuts through the heat, so if you're sensitive to acidity, reduce it to 1 teaspoon. For extra crispiness, toss the flour-coated chicken in olive oil before baking. The parsley is purely decorative but adds freshness—dried won't work here. Ranch dressing can be store-bought or homemade; just ensure it's well-chilled before serving.
Store leftover chicken in an airtight container for up to 3 days—it reheats beautifully in a skillet or oven. The marinade leftovers can be reduced into a sauce for dipping or drizzling over salads. For meal prep, bake an extra batch and freeze portions for up to 3 months. To reheat, bake at 375°F (190°C) for 10-15 minutes until crispy. The flour coating stays crispy when reheated properly, so don't microwave—it turns soggy. This recipe doubles as a dip base—simply shred the baked chicken and mix with cream cheese for a crowd-pleasing appetizer.
Why You'll Love This Recipe
- One-Pan Magic: I swear by this recipe—just toss the chicken thighs with melted butter, hot sauce, and minced garlic on a sheet pan. No bowls, no mess, and the oven does all the work while I sip my coffee.
- Sweet Heat Balance: That brown sugar glaze? It’s the secret weapon. The butter and sugar caramelize into a sticky, slightly sweet crust that cuts through the spicy kick—every bite is addictive without being overwhelming.
- Game for Game Days: Between us, this is my go-to for Super Bowl parties or lazy Sunday football. Serve it with celery and ranch, or dump it in a wrap for a crowd-pleasing finger food that disappears fast.
- Budget-Friendly Leftovers: Chicken thighs are cheaper than breasts, and this recipe stretches easily. Double the batch, reheat the next day in a skillet with a splash of water—still juicy, still crave-worthy, and zero waste.
Step-by-step instructions for baked boneless buffalo chicken
Here's how to achieve crispy, spicy chicken without the mess of traditional wings.
👨🍳 Step 1: Prepare the Spicy Marinade
In a medium bowl, melt the 0.5 cup unsalted butter in the microwave for 30 seconds or over a pot of simmering water. Let it cool slightly, then whisk in the 0.5 cup hot sauce, 2 tbsp brown sugar, 3 minced garlic cloves, and 1 tbsp apple cider vinegar. This tangy, spicy mixture is the heart of your flavor profile.
Stir in the 1 tsp salt and 0.5 tsp black pepper until fully dissolved. The marinade should be thick but pourable—if it's too thick, whisk in 1-2 teaspoons of water. Let it cool completely before using, or the chicken will start cooking in the marinade instead of absorbing the flavors.
🍳 Step 2: Coat and Rest the Chicken
Cut the 1.5 lb boneless, skinless chicken thighs into 1-inch pieces (about 6-8 pieces total). In a large bowl, toss the chicken pieces with the cooled marinade until every piece is fully coated. I like to use my hands for this—it ensures even distribution and helps the marinade cling to the meat.
Transfer the marinated chicken to a plate and refrigerate for at least 30 minutes (up to 4 hours for deeper flavor). This resting period allows the chicken to absorb the marinade fully, resulting in juicier, more flavorful pieces. Don't skip this step—it makes all the difference in the final texture and taste.
🥘 Step 3: Create the Baking Setup
Preheat your oven to 425°F and line two baking sheets with parchment paper. Arrange a wire rack on each sheet—this elevates the chicken for crispier edges. In a small bowl, whisk together the 2 tbsp all-purpose flour and 1 tbsp olive oil to create a light coating for extra crunch.
Here's the thing—this flour mixture acts like a dry brine. It helps create that signature crispy texture you get from traditional fried wings, but without the mess. Spread the flour mixture evenly on a plate so you can dip each piece of chicken before baking.
🔥 Step 4: Bake to Crispy Perfection
Remove the chicken from the refrigerator and let it sit at room temperature for 10 minutes while the oven preheats. Working in batches to avoid crowding, dip each piece of chicken into the flour mixture, pressing gently to adhere. Place them on the prepared baking sheets, leaving 1 inch between pieces for even air circulation.
Bake for 20-25 minutes until the chicken reaches an internal temperature of 165°F and the edges are deep golden brown. Flip the pieces halfway through baking at the 12-15 minute mark for even browning. The chicken should be tender but still juicy—if it's browning too quickly, tent the pan with foil to prevent over-browning.
🍽️ Step 5: Serve with Ranch and Garnish
Transfer the baked chicken to a serving platter and sprinkle with 2 tbsp butterflake parsley for a fresh finish. Serve immediately with 0.5 cup ranch dressing on the side for dipping. The contrast of cool ranch with the spicy, crispy chicken is what makes this dish irresistible.
For extra heat, drizzle additional hot sauce over the top just before serving. The chicken should be tender enough to pull apart with a fork but still hold its shape. Each bite delivers that perfect combination of spicy, tangy, and crispy—without the bone handling of traditional wings.
Pro Tips For Making Baked Boneless Buffalo Chicken
- CRANK THE OVEN HIGH: Start your chicken thighs at 425°F (220°C) for the first 15 minutes—this sears the edges and locks in moisture better than low-and-slow baking. After that, drop to 375°F (190°C) to finish cooking, or the butter sauce will burn before the chicken is done.
- BRINE THE CHICKEN: Toss the raw thighs in a mix of 1 cup water, 1 tablespoon salt, and 1 tablespoon brown sugar for 20 minutes before baking. The salt keeps them juicy, and the sugar caramelizes slightly, giving the sauce a deeper flavor without extra effort.
- SKIP THE GARLIC MASH: Minced garlic burns faster than you think. Instead, finely chop 4 cloves and let them sit in the hot sauce for 10 minutes before mixing with butter—this infuses flavor without turning the sauce bitter. (Yes, even if you’re impatient like me.)
- USE A THERMOMETER: Pull the chicken at 165°F (74°C) internal temp, not by visual guesswork. Thighs cook unevenly, and overbaking turns them dry—especially when baking with a wet sauce. A cheap instant-read thermometer saves seconds of regret.
Essential equipment for this recipe
Oven Essentials
Your oven is the star of this recipe, so invest in a good oven thermometer—I recommend the Thermoworks Oven Thermometer—to ensure accurate temperature readings. Baking at 425°F is critical for achieving that perfect crispy exterior while keeping the chicken juicy inside.
If your oven runs hot, reduce the temperature by 25°F to prevent over-browning. 🌡️
Baking Sheets
Use two heavy-duty baking sheets with wire racks on top for optimal airflow and crispiness. I prefer All-Clad Stainless Steel Half Sheet Pans because they distribute heat evenly and handle high temperatures without warping.
Line them with parchment paper to prevent sticking and make cleanup a breeze. Avoid glass pans—they can cause uneven cooking.
Mixing Bowls
A large mixing bowl (at least 3-quart capacity) is essential for marinating the chicken. I use OXO Good Grips Mixing Bowls because they’re non-slip and easy to clean. For the marinade, a medium bowl (about 2-quart) works well for melting the butter and whisking ingredients.
A small bowl (about 1-quart) is perfect for mixing the flour and olive oil coating. 🍲
Measuring Tools
Precision matters when balancing heat and sweetness in the marinade. Use a liquid measuring cup for the hot sauce and apple cider vinegar, and a dry measuring spoons set for the brown sugar, salt, and pepper.
A microplane is handy for quickly mincing the garlic cloves—it’s faster than a knife and ensures even distribution. For the flour coating, a small plate works best for dipping the chicken.
Tongs and Thermometer
Tongs are a game-changer for flipping the chicken halfway through baking without breaking it apart. I love OXO Good Grips Kitchen Tongs—they’re sturdy and easy to grip. A meat thermometer (like the Thermoworks Smoke) is non-negotiable to ensure the chicken reaches 165°F safely. Avoid guessing—undercooked chicken is a risk, and overcooked chicken ruins the texture. 💡
Optional Upgrades
For extra crispiness, consider an air fryer like the Ninja Foodi DualZone—it cuts baking time in half while delivering that signature crunch. If you’re serving a crowd, a large serving platter (like the Le Creuset Stoneware) keeps the chicken warm and makes presentation effortless.
And for garnishing, a small pair of kitchen shears makes chopping butterflake parsley quick and easy. 🌟
Nutrition facts
Frequently asked questions
Can I use chicken breasts instead of thighs?
Chicken breasts are leaner and more prone to drying out during baking. For best results, stick with thighs—they stay juicier and develop that signature crispy exterior. If you must use breasts, pound them to an even ½-inch thickness and reduce baking time by 3-5 minutes to prevent overcooking.
How can I make this recipe less spicy?
Reduce the hot sauce to ¼ cup and replace the remaining ¼ cup with extra butter or a mild sauce like sriracha. For a milder kick, add 1 tbsp honey or maple syrup to the marinade to balance the heat. Always taste the marinade before applying it to the chicken.
Why is my baked chicken not crispy?
Crispiness depends on three key factors: the flour coating must adhere well, the oven must be fully preheated, and the chicken should bake uncovered. Ensure your baking sheets have wire racks for airflow, and don't overcrowd the pan. For extra crunch, broil for 1-2 minutes at the end (watch closely).
Can I make this in an air fryer?
Preheat the air fryer to 400°F and cook the flour-coated chicken in batches for 8-10 minutes, shaking halfway. The air fryer delivers crispiness in half the time and requires less oil. Just reduce the marinade by 1 tbsp since air frying concentrates flavors.
What are the best sides to serve with this?
Classic options include celery sticks with ranch, blue cheese dressing, or a crisp green salad. For a heartier meal, pair with mashed potatoes, roasted sweet potatoes, or garlic bread. The cool, creamy contrast balances the spicy heat perfectly.